Do Not Remove Any Of The Art Without Permission! The Creation of a Comic Book Page by Tim Levins Step One Rough Layouts After reading the script and heaping much well-deserved praise on Scott Peterson, B:GA’s writer, I draw some very rough layouts of each of the issue’s 22 pages. In Scott’s scripts, he breaks down the action page-by-page and panel-by-panel, making it easy for me to visualize each page in my mind. One of the most important things for me to decide, though, is how to “shoot” each scene. Imagine a movie or a TV show - the camera is rarely positioned at the same angle throughout the production. The director chooses a wide variety of camera angles, each one designed to convey the subject matter to the audience in the most effective manner possible (close-ups for showing a character’s emotion, long shots to establish a setting, etc.). I have to do pretty much the same thing - figure out the best way to tell the story, and which “camera” angles would help me achieve that. The page layout has to be clear and easy to follow, yet visually interesting. Even though these layouts look ridiculous, this is actually one of the hardest parts of my job. When I’m done, I fax the layouts to my editor, who gives me feedback. If there are problems, I can easily fix them at this stage. If everything looks good, I move on to the next step! 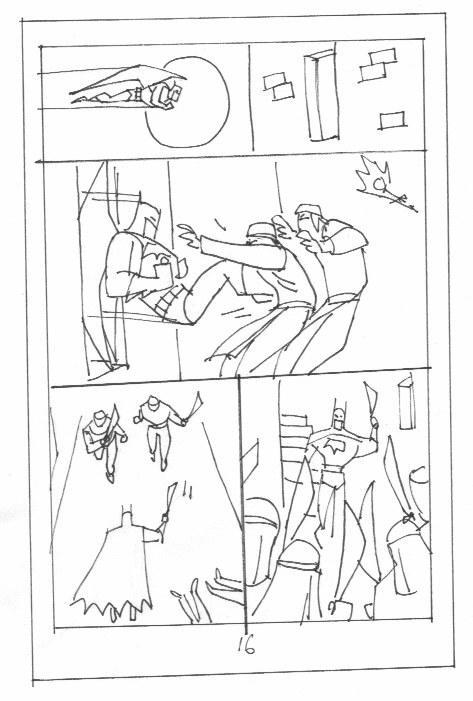

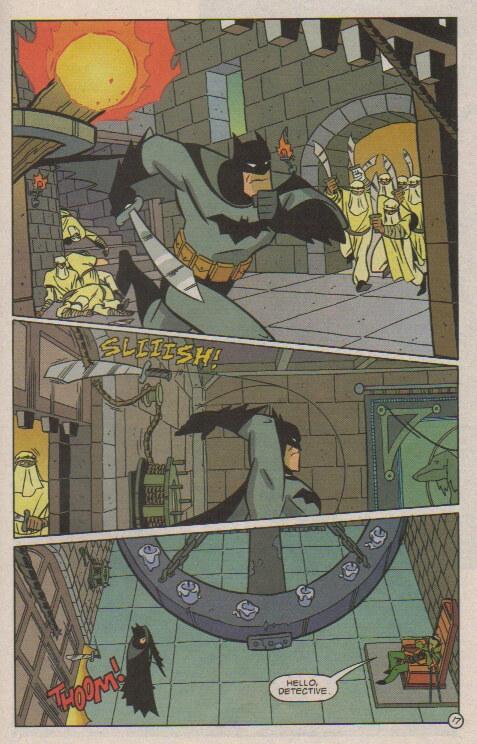
Click 'Em! Step Two Rough Pencils I roughly sketch out each page using a “blue-line” pencil. I’m not sure how many other artists use this method, but I kind of got in the habit when I was studying animation in college, where we were encouraged to use blue pencils in the sketching stage. (I’m so used to it now that I find it hard to draw with a regular black pencil!) The major benefit is that the sketches are very light and easy to erase or alter. Once I’ve roughly fleshed-out each panel in blue, I may use a black or sometimes a purple (don’t ask) pencil to tighten up the certain parts of the drawings if I think it’s necessary. You may notice that some things have changed from the layout stage, such as panel shapes and camera angles, and this is something that happens fairly often. At this point, it’s easier for me to see what “works” and what doesn’t, or to improve on decisions I made in the layout stage. The last panel of page 17, for example, seemed like a somewhat boring conclusion to this scene in the layout. Although it’s still just a face-to-face showdown between Batman and Ra’s in the rough pencil stage, the angle is a bit more dramatic, and it allows us to see the huge wooden door slam shut behind Batman, which helps make the action a bit clearer (“What happened to all those guys chasing Batman?!”). 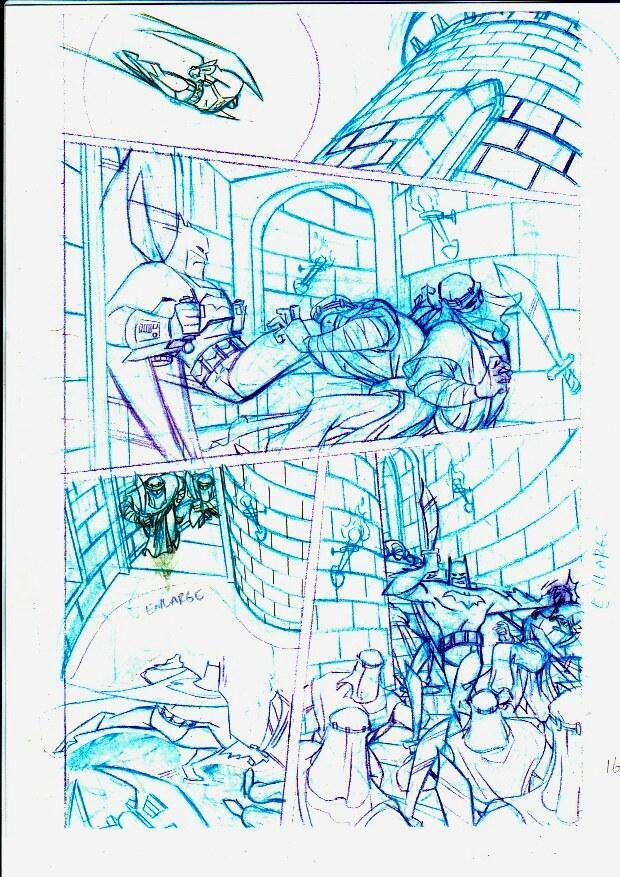

Click 'Em! Step Three Finished Pencils In one of my more foolish and time-consuming artistic decisions, I first draw each page in blue pencil on a just a regular piece of paper. Then I use a light-table (a table with a white, opaque, plastic surface and a light shining through it from behind) to trace and “clean-up” each rough page onto the “official” DC Comics paper, using a black pencil. I do this for two reasons - (1) I like to make it easier for the inker (the fantastic Terry Beatty) to work on the pages; and (2) I’m way too nit-picky for my own good. Every drawing I do has to be “just so”, or I’m not pleased with it. Foolish? Probably. Time-consuming? Definitely. In the end, though, it makes me happy, so I guess it’s worth it. The pages shown here are actually photocopies of my finished pencils, and not very good copies at that. Still, you get the idea. 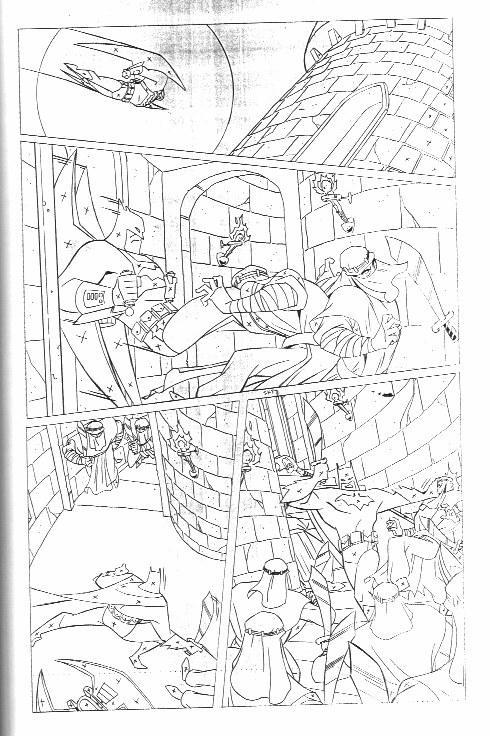
Click 'Em! (Note: Due to a site error, Pencils02.jpg was lost.) Step Four Lettering and Inking Once I finish the pages, I send them to the letterer, who puts in any word balloons or sound effects. Then the pages move on to the inker (the aforementioned wondrous Mr. Beatty), who embellishes my thin pencil lines, making them thick and full of energy! He also fills in any black areas (which I indicate with an “x”) and deserves a huge amount of credit for making me look better than I am! 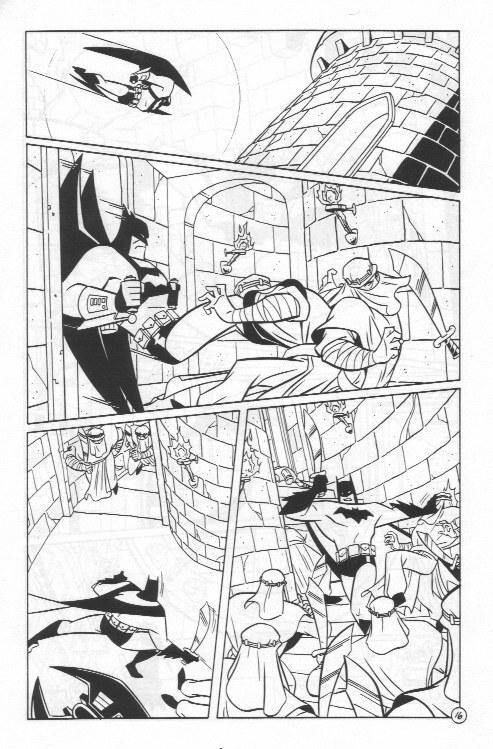

Click 'Em! Step Five Colouring After Terry finishes inking the pages, they get sent to the colourist -- in our case, the amazing Lee Loughridge, whose talents really bring this book to life! 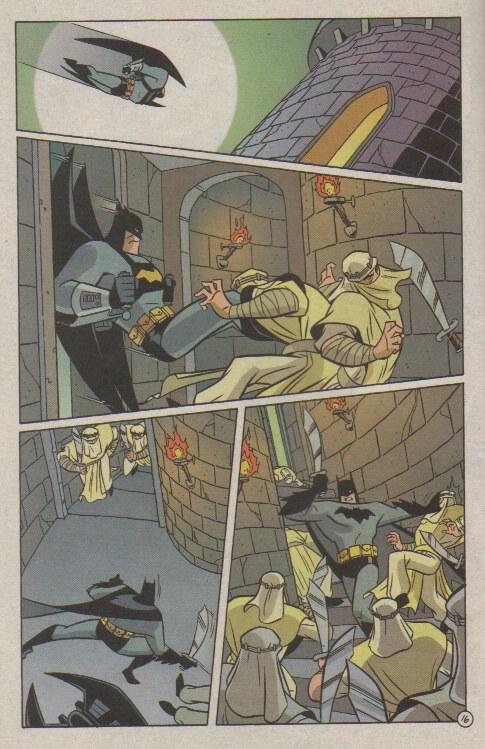
Click 'Em! [ Back to Backstage ] |